Last updated: July 19, 2023
A complete guide explaining how to burn a tree stump so you can remove it with only a few tools and a bit of patience.
So you have an old tree stump in your garden or yard, and you’re thinking of removing it, or having it removed, by means of burning.
While there are various ways to remove tree stumps, burning is a cost-effective and relatively easy way to accomplish that goal with only a few tools and some patience.
Are you wondering where to start? Here’s a detailed step-by-step guide on burning a tree stump efficiently and safely.
Quick navigation:
Steps to Burn a Tree Stump
When burning a tree stump, you need to follow three significant steps:
- Preparing the stump
- Burning the stump
- Cleaning up
Note that open fire is dangerous, especially if it’s close to structures or a forest. Ensure it’s legal to burn stumps in your area. If the open burning regulations require a permit, make sure to get one before starting.
Additionally, keep a hosepipe with water flow turned on or a couple of buckets of water just in case the fire spreads. Do not leave the fire unattended.
Here is a list of tools you’re going to need:
- A power drill with a spade bit or any other wood-boring bit connected
- Potassium nitrate (saltpeter)
- Dry pieces of scrap wood
- A bucket of hot water
- A spout cup or funnel
- A shovel
- Protective gear (gloves, mask, goggles)
- Kerosene (optional)
- Matches
Let’s go through the steps of burning a tree stump.
1. Preparing the Stump
The stump you’re trying to burn should be dry wood. A newly-cut green stump will take ages to burn, that is if it actually burns at all.
For best results, the stump should be dead for about 12-18 months, depending on climate conditions.
1.1. Clear up the Area Around the Stump
You need to remove anything that can catch fire from the stump’s base and the area around the stump.
Use something like a rake to remove pieces of sticks, dead leaves, trash, and anything combustible. This is very important.
1.2. Drill Holes Into the Stump
Take a power drill and attach a spade bit or any other wood-boring bit. Drill a hole about 8-10 inches into the top center of the stump.
If the stump is shorter than that, you can drill until you reach the roots. Drill several more holes into the top of the stump, leaving about 1-2 inches between each hole. Ensure you remove the debris from the holes.
Repeat the process and drill holes into the sides of the stump. If it has extensive roots, make holes there too. If possible, connect the vertical and the lateral holes to improve air circulation.
1.3. Fill the Holes With Potassium Nitrate
Once the holes are established, fill them up with potassium nitrate, also known as saltpeter. It helps to ignite the stump and burn it exceptionally well. Use a garden trowel.
Important:
Wear protective gear such as goggles, gloves, and a mask when handling potassium nitrate. It can cause sore throats and coughing if inhaled. Contact with the skin and eyes can cause pain and redness.
1.4. Pour Hot Water on the Holes
Using a funnel or a spout cup, pour hot water into the holes. Hot water helps dissolve saltpeter so it can spread in the stump, making it more flammable. Continue pouring until all the saltpeter has dissolved.
Once it has soaked in, you can top it up with kerosene, but this is optional. If you used kerosene, allow it to sit for a few days. Once all the kerosene is soaked in, get ready to ignite it.
2. Burning the Stump
Now that you have prepared the stump, it’s time to put it on fire.
2.1. Cover the Stump
Place kindling or scrap wood on top of the stump and all around it, kind of like in a cone shape. Dry barks and leaves also make good kindling.
Ensure you leave air holes for air circulation.
2.2. Ignite the Stump
Use a match to ignite the kindling and light the scrap wood. Do NOT use a gaslighter.
Allow some time to ignite the stump. Depending on the dryness level and other factors, different stumps take different amounts of time to ignite and start burning.
If necessary, add more wood to the fire until the stump burns entirely. It’s important to note that you should expect embers and smoke. That’s why it’s necessary to ensure it’s not windy, because the embers may spread the fire.
A small stump can burn for 2-3 days. Keep adding wood as necessary, then leave it to burn till morning. If it’s still not wholly burnt, chances are, the fire will not be out yet. Add more wood, but if it’s already out, reignite.
2.3. Monitor the Fire
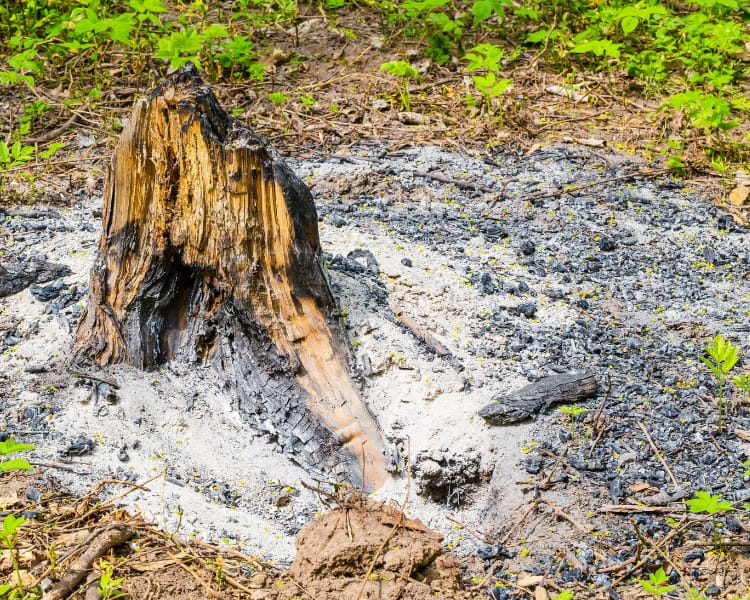
Until there’s no wood left on the stump, your work is not over. Monitor the fire until the stump burns to ashes, and make sure you don’t need to reignite the fire.
Also, it will help to ensure it doesn’t burn out of control. In case it does, pour water or dirt to control it. The embers may take days to go off. Keep stirring them and checking the progress until you’re sure there’s no fire left.
3. Cleaning Up
Once you’ve burned the stump, the cleaning-up process starts.
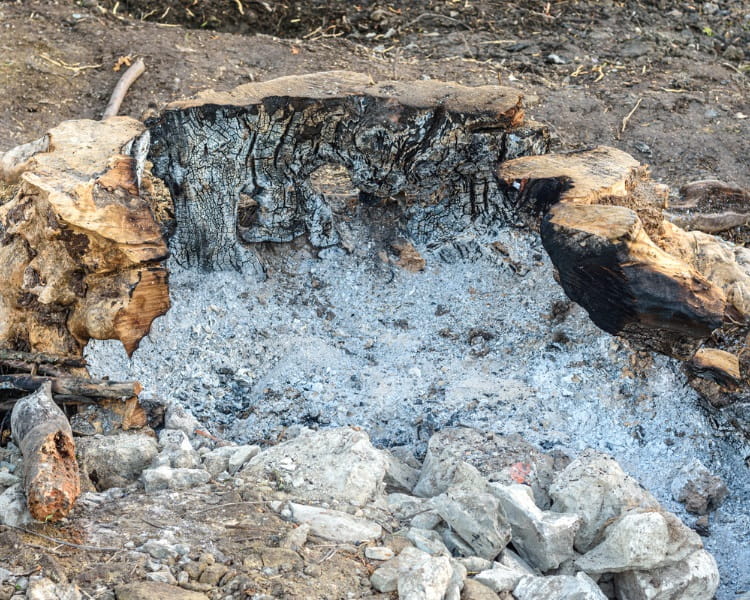
3.1. Remove Debris
The burned stump will leave behind a good amount of debris that you will need to remove.
Some may still be smoldering and can rekindle the fire if not handled well. You don’t want that, so we suggest removing the remaining materials carefully and entirely.
Place the burned pieces and root debris in a fire-resistant container. Metal containers can get hot, while plastic and wood will burn if the pieces are smoldering.
You can use a concrete or clay container to hold the pieces until you’re sure they can’t rekindle the fire.
3.2. Remove Remaining Roots
Some roots may be too stubborn to burn completely. Once the fire is out, use your shovel to break up any remaining roots. If you find that they are still hard to break, use an ax instead.
Also, remove any remaining stump pieces. Be careful not to touch them with your bare hands, as they might still harbor some heat that can burn you.
3.3. Fill the Hole With Soil
After removing all the debris, fill the hole where the stump was with soil up to the ground level.
Open pits can cause accidents and fill up with stagnant water when it rains, and dirty stagnant water in the yard is something you will want to avoid.
Do you want to grow grass where you removed the stump? After filling the hole, cover it with turf seed and monitor how the area evolves.
Final Thoughts
It might seem like a lengthy process, but it doesn’t require all that much physical effort. It’s an excellent alternative to professional stump removal.
You need to prepare the stump properly, leave it for a while, then come back and ignite it. While it’s relatively safe to burn a stump, you must take precautions. Ensure it’s safe and legal to do in your area, and if you need a permit, get that before starting.
Also, avoid doing this chore in windy conditions, and always have water ready should the fire spread.